Index
Overview
As your club/organization moves forward with creating programs, registering participants, selling products, and more, you're going to want to keep track of things. This is where reports come in. The Uplifter system has a myriad of robust reports that can be customized and saved, downloaded and previewed.
The Reports page is found by navigating to Reports. In order to access the Reports page you will need the following permissions: Admin, Report Manager.
Which Report Should I Use?
Financial Data
Invoice Breakdown
- Invoices - Detailed
- Invoices - Summary
- Ledger Report
- Invoices - Unbalanced Payments
Owing Balances
- Payments - Overdue
- Financial - Age Receivables
- Financial - Age Receivables Historical
- Invoices - Unbalanced Payments
- Invoice - Summary
- Payments
Payment Information
- Payments
- Invoice - Summary
- Payments - Invoice Summaries
Revenue
- Ledger Report
- Revenue Report - Detailed by Invoice Line Item
- Revenue Summary Report - By Product SKU
- Revenue Summary Report - By Program Registrations
- Revenue Summary Report - by Category Level
Registration/Product Purchase Data
Program Registrations
- Participants - Registered Programs
- Invoices - Detailed
- Invoice - Summary
Product Purchases
- Product/Subscription Purchase Reports
- Invoices - Detailed
- Invoice - Summary
Volunteering
- Volunteer Positions
Member/Participant Data
Member Information
- Members
- Registration Custom Fields Report - Detailed by Invoice Line Item
Member Preferences
- Member Message List Opt In Times
- Policies - Member Agreement Registration Invoice
Volunteering
- Volunteer Positions
Participant Information
- Participants
- Registration Custom Fields Report - Detailed by Invoice Line Item
- Participants - Registered Programs
- Participants - First Registration Time
Filtering
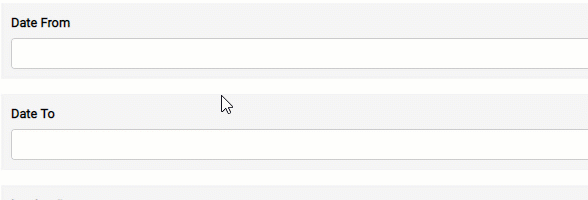
Filtering is an important aspect to reports, as it will determine the amount and type of data that you receive from the report. Many filters are date ranges allowing you to specify a time frame in which the system should search for data. Others will be a list of check box options.
When choosing your filters you will want to consider the type of data you wish to review. The more specific you can be, the more specific the data you will receive.
Relative Filters
Reports that offer date range filters will allow for relative terms. Relative terms are based on the date you are filtering your report on. This makes saved reports incredibly useful. Terms like "first day of this month" or "last day of last month" let you save and use reports that will always pull the right data for your purposes.
Learn More
Some additional example terms are:
- Days
- now
- today
- tomorrow
- +# days (where # is replaced by your desired number of days. Ex. "+3 days")
- -# days (where # is replaced by your desired number of days. Ex. "-5 days")
- next Thursday
- last Monday
- Weeks
- next week (selects the Monday of said week)
- last week (selects the Monday of said week)
- +# weeks (where # is replaced by your desired number of weeks. Ex. "+7 weeks")
- -# weeks (where # is replaced by your desired number of weeks. Ex. "-2 weeks")
- Months
- next month (selects the closest date to current within next month. Ex. if today is the 3rd, it will pick the 3rd of next month)
- last month (selects the closest date to current within last month. Ex. if today is the 3rd, it will pick the 3rd of last month)
- first day of this month
- last day of this month
- first day of last month
- last day of last month
- first day of next month
- last day of next month
- Years
- this year (select the current date)
- next year (selects the closest date to current within next year. Ex. if today is the 3rd of August, it will pick the 3rd of August for next year)
- last year (selects the closest date to current within the previous year. Ex. if today is the 3rd of August, it will pick the 3rd of August for last year)
- +# years (where # is replaced by your desired number of years. Ex. "+9 years")
- -# years (where # is replaced by your desired number of years. Ex. "-4 years")
Columns to Display
Once you are happy with your filters you may also select the columns you wish to be displayed in your report. To add columns, select them from the left list. To remove them, select them from the right list after having being added. If you would like to see all columns in the report you can simply leave all items in the left list and the report will default to include them all. Alternatively, you can also select the +Add All option.
Downloading/Previewing
The final step is to select to either download or preview your report (or Save it). By selecting either Excel (where available) or CSV you will prompt the system to download a copy of the filtered report. Alternatively, if you only need to review the data quickly, you can also select to Preview. Previewing the report will pull the data into the browser and display it in a table for your use. You can filter these tables by column by selecting the column header.
Saved/Custom Reports
On nearly all reports you will find the option to Save. This option will respect the filters you have applied to the report and offer to save it as a variation. In the pop-up that will generate you may title your report and select who to share it with.

Saved reports will be listed on the Reports page for repeat access.
Save This As...
When saving a report you can also opt to mark off a "Save This As..." option. These options will let you set your report as a default to varying degrees. Note that when selecting one of these options you will not be able to use the Share options in tandem.
Save This As The Global Report
By choosing this option the filters and columns you have set in the report will become the default throughout your entire site for all users. When this has been completed you will no longer need to reapply these filter settings as they will be automatically applied each time you access your report. This is very similar to the Save Report feature, except that it alters the core report itself as well as changes how the same reports will function when accessed elsewhere.
For example: updating the filters and columns for the Programs - Class List Attendance Printouts report would alter the report results for anyone accessing the report from the Reports page. However, it will also update the results for anyone accessing it from the Dashboard's Today's Events tool.
Save This As My Default Report
By choosing this option the filters and columns you have set in the report will become the default throughout your entire site for only you. When this has been completed you will no longer need to reapply these filter settings as they will be automatically applied each time you access your report. This is very similar to the Save Report feature, except that it alters the core report itself as well as changes how the same reports will function when accessed elsewhere.
For example: updating the filters and columns for the Programs - Class List Attendance Printouts report would alter the report results when you are accessing the report from the Reports page. However, it will also update the results for when you are accessing it from the Dashboard's Today's Events tool.
Sharing Options
View Only Access
This drop down will offer you three options. Your selection will determine who may view the end-result data of the report. Your options are: Only Me, All Administrators who have permission for this report type, and Specific Members.
By selecting All Administrators who have permission for this report type anyone with Admin & Report Manager permissions will be able to view the report on the Reports page.
By selecting Specific Members the system will offer you the ability to choose the desired member(s) you wish to have visibility on this report. You may also select to "Send an email with the report's URL to all members you are sharing this report with" by marking the box next to the option before saving.
Once you are happy, select Save.
View & Edit Access
This drop down will offer you three options. Your selection will determine who may view the end-result data of the report as well as edit the report to change the data that is pulled. Your options are: Only Me, All Administrators who have permission for this report type, and Specific Members.
By selecting All Administrators who have permission for this report type anyone with Admin & Report Manager permissions will be able to view and edit the report on the Reports page.
By selecting Specific Members the system will offer you the ability to choose the desired member(s) you wish to have access to this report. You may also select to "Send an email with the report's URL to all members you are sharing this report with" by marking the box next to the option before saving.
Once you are happy, select Save.
Reports Page Alternatives
On certain tiers of Uplifter you may find you do not have access to the reporting page. Not to worry, you still have a lot of built in reporting options. These options can be found by navigating to the page that handles the topic, and then using the built in filters and reporting tool to gain your desired information.
For instance, if you would like information on purchases or spending, you would want to navigate to the Invoices page, or perhaps the Payments page. From here, you can filter your page as desired to find the information you wish, using the filters on the page itself. Once you have filtered, select the CSV icon or Advanced CSV (if available) to create a report. The report will respect any filters you have applied to the page!