Index
Overview
This article will review how to perform evaluations within the Uplifter system. Please note that some of the access points noted in the article below may depend on the system permissions you have been granted.
In order to access the Evaluations tool you will need the following permissions: Admin, Can Perform Evaluations.
Accessing The Admin Tools
- Log into your organization's Uplifter system
- Hover over your name at the top right
- Click Admin
OR
- Log into your organization's Uplifter system
- Hover over your name at the top right
- Click My Account
- Click the Admin button

To access the admin side of the Uplifter system you first need to log into your member account. From there, hover over your name at the top right and click Admin within the menu. Alternatively, you can hover over your name and select My Account. On the My Account page you can select the Admin button.
Please note, if you do not see these options you will need to request permissions from your site admin.
Accessing Evaluations
Accessing the evaluations tool is the first step to performing an evaluation. Doing so can be done in two main ways. The first is through the Quick Start Dashboard while the second is from the Dashboard calendar.
Accessing Through The Quick Start Dashboard
- Click the Evaluations
 icon next to the appropriate program listing

To access the evaluations tool through the Quick Start Dashboard simply find the desired program listing on the right. Click the Evaluations icon next to said listing and the system will load the applicable evaluations.
Accessing Through The Calendar
- Click the event listing on the calendar
- Select Evaluations from the menu

To access the evaluations tool through the calendar simply find the desired event on the Dashboard calendar. Click on the event listing and select Evaluations from the menu. The system will load the applicable evaluations.
Taking Attendance
- Mark attendees
- Click Take Attendance

If you have not yet taken attendance otherwise, the system will require that you take attendance before evaluating. On the Attendance tab you can mark your attendees present or absent, change their participant groups, add a note (which the member and participant can see), and add guest participants. Please see our Instructors - Taking Attendance article for more information on these practices.
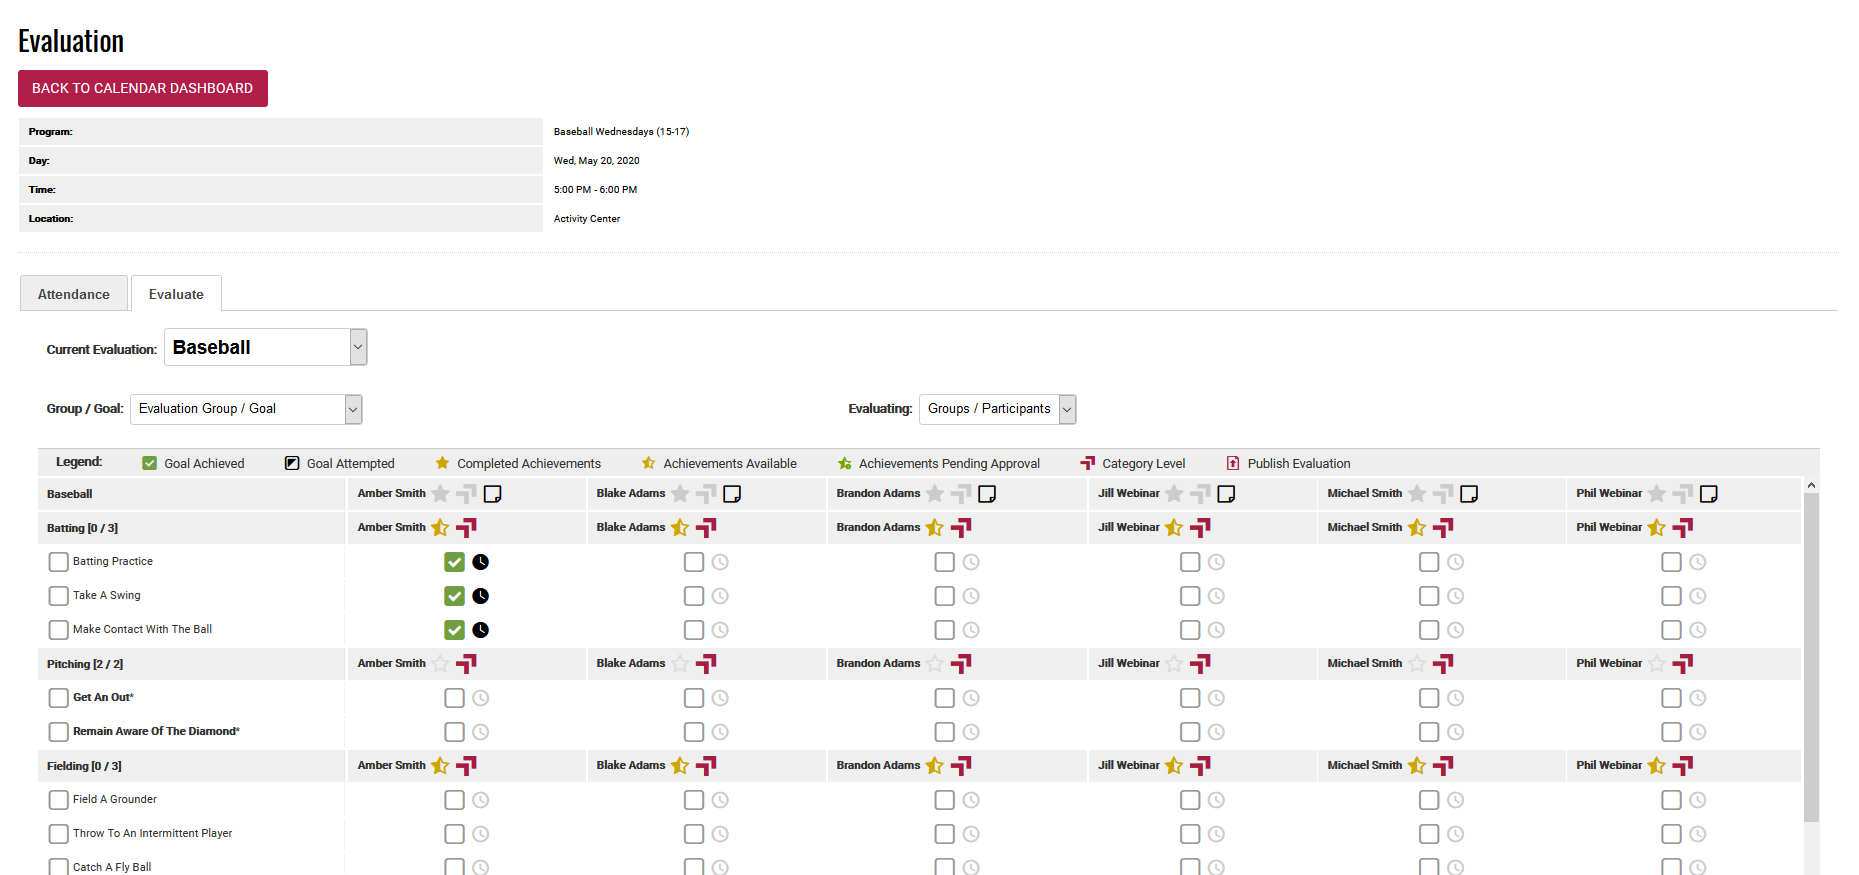
Navigating The Evaluation Page
The evaluation page is broken up into three mains sections. The first, at the top, is the info section. This details some basic information about the program you are evaluating. The next section is the controls section. This offers you tabs to switch between attendance and evaluations, as well as drop downs to use to change your current evaluation, goal groups, and participant groups. Finally, the third and main section, is the evaluation tool that lets you perform your evaluation.
Change Your Evaluation
- Select the desired evaluation from the Current Evaluation drop down

To update your the evaluation you are currently working with use the Current Evaluation drop down. Selecting a different evaluation from the one you are on will prompt the system to load the selected evaluation. Please note, if you do not see a desired evaluation listing you will need to request it to be created/added by your site admin.
Evaluations are created/editable and associated to specific programs by the site admin(s). Some evaluations are available for import and the initial structure thereof comes from Uplifter. These evaluation are still editable if changes are desired.
Change Your Goal Group
- Select the desired goal/goal group from the Group/Goal drop down

To update the goal group or goal you are reviewing use the Group/Goal drop down. Selecting a specific group or goal from the list will focus the listings in the evaluations section. Drop down options with an asterisk beside their name have been denoted as required in order to pass. Return the drop down selection to "Evaluation Group/Goal" to restore the full listings.
Goal Groups and the Goals within are created/editable by the site admin(s) during the creation of the evaluation. Some evaluations are available for import and the initial structure thereof comes from Uplifter. These evaluation are still editable if changes are desired.
Change Your Participant Groups
- Select the desired participant group/participant from the Evaluating drop down

To update the participant group or specific participant you are reviewing use the Evaluation drop down. Selecting a specific listing will focus the evaluations section to only that(those) listing(s). Return the drop down selection to "Groups/Participants" to restore the full listings.
Participant groups are created/editable by the site admin(s).
Evaluating
To perform an evaluation within Uplifter you need only mark the results of the participant into the system. Depending on the goal in question this may be in the form of a numerical or letter grade. Often, though, it is in the form of a simple true or false check mark toggle.
Mark A Goal
- Locate the desired participant/goal intersection
- Update the goal status as desired

To update a participant's goal status simple find the intersecting point between desired participant and desired goal. Here you will find the goal's marking option. In many cases this will be a check mark box. In some cases this may be a numerical or letter grade. Update the value as desired.
Please note, some evaluations may have their Attempted  status disabled. This means the check boxes will then toggle between Completed
  and Not Attempted
  directly. This can be enabled/disabled by the site admin(s).
Mark An Achievement
- Hover over the Achievement
 icon
icon - Click on the desired achievement

To update a participant's completed achievements you'll want to hover over the Achievement  icon next to their name. The system will then present you a list of achievements that are possible to grant the participant. Please note, it is possible that each goal group will have different achievements. Click on the desired achievement to grant it to the participant.
Please note, the achievements available, and the goal groups they are associated to, are/can be assigned by the site admin(s).
In some cases achievements require certain goals to be completed. This is indicated by the Achievement icon  being greyed out. Once the goals are completed the Achievement icon will indicate achievements are available. Once granted, the Achievement icon will indicate achievements (at least one) have been attained.

Mark A Category Level
- Hover over the Category Level
 icon
icon - Click on the desired category level

To update a participant's completed category level you'll want to hover over the Category Level icon next to their name. The system will then present you a list of category levels that are possible to set to complete for the participant. Please note, it is possible that each goal group will have different category levels. Click on the desired category level to mark it as completed for the participant.
Undoing Marks
Undoing marks granted to participants can often require that you access their profiles. This will depend on the mark granted.
Goals: Goals can be undone by navigating back to the original evaluation and unchecking (or erasing) the data. This must be done on the same event by the same instructor as the original mark.
Achievements: Achievements can be undone by navigating to the participant's profile. Here, you will need to select the Achievements option on their profile menu. On the Achievements page you must then find the achievement listing and click the Delete  icon next to it.
Category Levels: Category Levels can be undone by navigating to the participant's profile. Here, you will need to select the Achievements option on their profile menu. On the Achievements page you must then find the category level and click on the name. In the pop-up you will want to update the Status of the category level. You must then update the Start and End Dates appropriately.
Saving And Publishing
- Click Save
- Click the Publish
 icon
icon - Click the Publish button
Once you have performed your evaluation you can save your marks. Saving keeps the marks but does not publish them. This means you have time to review and update the marks granted if you wish. The final step is to publish the marks which finalizes them and makes them accessible/visible to the member and participant.

To save your evaluation simply click Save at the bottom of the evaluations page. Once done, you will see that any participants you have marked now show a Publish icon next to their names. Clicking this icon will allow you to offer any notes and complete the publishing process.
You can also publish evaluations from the participant's profile if desired.